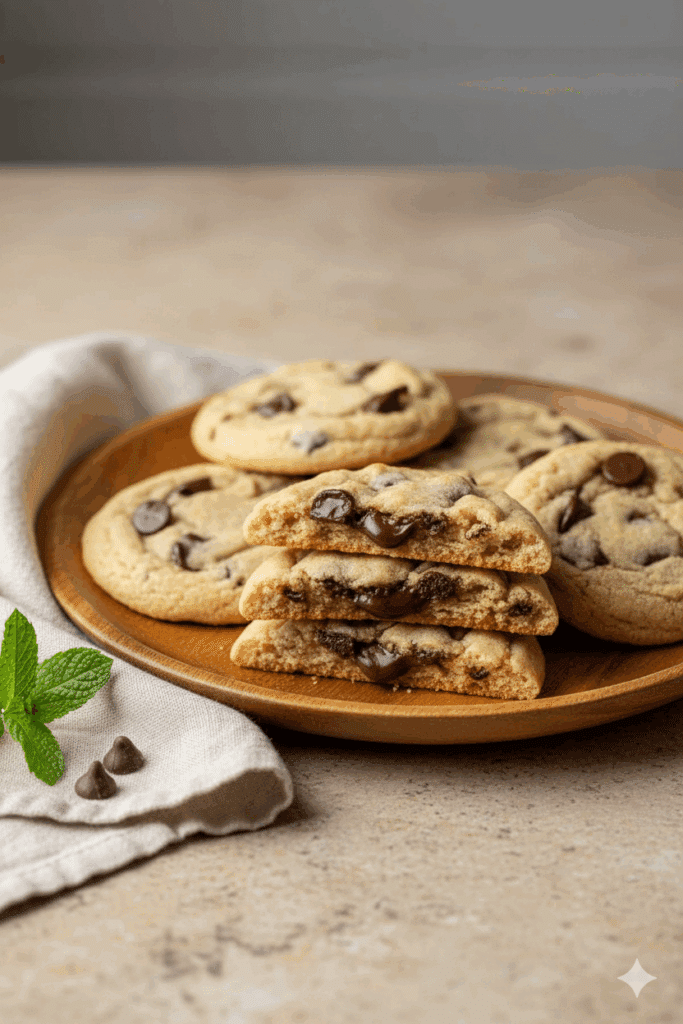
These dairy free chocolate chip cookies are everything you could dream of — soft, gooey in the center, with perfectly crisp edges and a rich buttery flavor you’d never guess came from dairy-free ingredients. With only 9 simple pantry staples and no chilling time, you’ll have a batch of freshly baked cookies ready in just 20 minutes!
Stack of golden cookies with melted chocolate chips? Yes, please.
For years, I avoided making my own version of dairy free cookies because there were already so many out there. But the truth is, everyone has their own vision of the perfect chocolate chip cookie — and this is mine.
These cookies are ridiculously easy to make, dangerously delicious, and impossible to stop eating. (Don’t ask how many I had during testing… let’s just say more than a few!)
If you’re on a dairy-free journey, you’ll also love my dairy free oatmeal cookies and dairy free peanut butter cookies — both tried-and-true crowd favorites.
Why You’ll Love These Dairy Free Chocolate Chip Cookies
These aren’t just any cookies — they’re the kind you’ll bake again and again. Here’s why:
- ✅ Completely dairy free and nut free, yet rich and buttery in flavor.
- 🍪 Thick, soft, and gooey centers with lightly crisp edges.
- ❄️ Freezer friendly — bake the dough now or later.
- ⏱️ No chill time and just 20 minutes from start to finish.
- 🥚 Uses only one egg, keeping them soft instead of cakey.
- 🍫 Easy to customize — swap in white chocolate, dark chocolate, or even nuts if you like!
Ingredients You’ll Need
You only need a handful of ingredients to make these delicious dairy free chocolate chip cookies. Here’s what you’ll need and a few tips for success:
Dairy-Free Butter: Use any plant-based butter you love. My favorite is one that’s rich and creamy, not oily. If you’re not dairy-free, regular butter works perfectly too.
All-Purpose Flour: Stick to the classic for the best texture. You can replace up to ⅓ with whole wheat flour if you like a nuttier flavor.
Light Brown Sugar: Gives the cookies their chewy texture and subtle caramel flavor. Dark brown sugar will make them deeper in flavor and color — equally tasty!
Granulated Sugar: Adds structure and just the right sweetness.
Egg: One large egg helps bind the dough and keeps it soft.
Vanilla Extract: For that classic warm bakery flavor.
Baking Soda & Salt: Essential for lift and balance.
Dairy-Free Chocolate Chips: I love using semi-sweet ones, but dark or white chocolate chips also taste amazing. Chop up a chocolate bar if you want bigger chocolate pools!
Step-by-Step Instructions
Step 1: Preheat and Prep
Set your oven to 350°F (180°C). Line two baking sheets with parchment paper for easy cleanup.
Step 2: Cream the Butter and Sugars
In a large mixing bowl (or stand mixer), beat together the dairy-free butter, granulated sugar, and brown sugar for 1–2 minutes until the mixture is light and fluffy.
Step 3: Add Wet Ingredients
Add the egg and vanilla extract. Beat just until combined — don’t overmix.
Step 4: Add Dry Ingredients
In a separate bowl, whisk together flour, baking soda, and salt. Gradually add this to your wet ingredients and mix until a soft dough forms. Fold in your chocolate chips or chunks.
Step 5: Scoop and Bake
Scoop 1½ tablespoon portions of dough onto your baking sheets, leaving about 3 inches between each cookie. Bake for 8–11 minutes, just until the edges are golden and the centers look slightly underbaked.
Step 6: Cool and Enjoy
Let the cookies cool on the tray for 5 minutes before transferring them to a wire rack. They’ll finish baking as they rest, giving you the perfect chewy texture!
Why Did My Cookies Turn Out Cakey?
If your cookies turned out thick and cakey instead of soft and chewy, you probably added too much flour.
The best way to avoid this is by weighing your flour with a kitchen scale, or using the scoop-and-level method: fluff your flour first, spoon it into the cup, and level it off with a knife.
A kitchen scale is one of the best investments for perfect cookies every time!
Best Dairy-Free Chocolate Chip Brands
Finding the right chocolate chips can be tricky, but here are a few reliable dairy-free options:
- Enjoy Life Semi-Sweet Chocolate Chips (top allergen-free choice!)
- Nestle Toll House Allergen-Free line
- Walmart’s “Free From” Brand
- Store brands — check labels! Many semi-sweet options contain no milk, even if not labeled “dairy-free.”
⚠️ If you have a severe dairy allergy, always double-check for cross-contamination or “may contain milk” warnings.
Light vs. Dark Brown Sugar — Does It Matter?
Both sugars will work!
- Light brown sugar gives a mild caramel sweetness and lighter color.
- Dark brown sugar adds richer molasses flavor, darker color, and extra chewiness.
If you want a deep, bakery-style flavor, try using half of each.
What to Do If Your Brown Sugar Hardened
Don’t toss that rock-solid brown sugar!
Place it in a microwave-safe bowl with a damp paper towel over top and heat it in 10-second bursts. Stir between each round until it softens.
To prevent this in the future, store your sugar with a brown sugar bear — it keeps it perfectly soft for months.
Expert Baking Tips
- Measure your flour correctly! Too much will make your cookies dry and cakey.
- Underbake slightly. Cookies continue baking on the tray after coming out of the oven, so remove them when the centers still look soft.
- Pack your brown sugar. Firmly press it into the measuring cup so it’s level with the top.
- Use room temperature butter. It should be soft enough to press a finger into easily but not melted.
Storage & Freezing Tips
These dairy free chocolate chip cookies taste best fresh, but they store beautifully!
- Store in an airtight container or zip-top bag at room temperature for up to 5–6 days.
- To make them gooey again, microwave one cookie for 5–10 seconds before eating.
- Freeze baked cookies for up to 2 months in a sealed freezer bag.
- Freeze unbaked dough balls on a tray, then store them in a freezer bag for up to 2 months. Bake from frozen — just add 1–2 minutes to your baking time.
The Best Dairy Free Chocolate Chip Cookies (Soft, Gooey & Buttery!)
- Total Time: 20 min
Ingredients
Dry Ingredients
2 cups + 2 tbsp (268 g) all-purpose flour
¾ tsp baking soda
¾ tsp salt
Wet Ingredients
¾ cup (158 g) dairy-free butter, softened (or regular butter if not dairy-free)
½ cup (100 g) granulated sugar
½ cup (105 g) packed light brown sugar
1 large egg
1 tbsp vanilla extract
Add-ins
½–¾ cup dairy-free chocolate chips or chopped dark chocolate (semi-sweet recommended)
Instructions
- Step 1 – Prep the Oven:
Preheat your oven to 350°F (180°C). Line two baking sheets with parchment paper or silicone mats. - Step 2 – Mix Dry Ingredients:
In a medium bowl, whisk together flour, baking soda, and salt. Set aside. - Step 3 – Cream Butter & Sugar:
In a large mixing bowl (or stand mixer with a paddle attachment), beat the dairy-free butter, granulated sugar, and brown sugar together for about 1–2 minutes, until the mixture is light and fluffy. - Step 4 – Add Egg & Vanilla:
Add the egg and vanilla extract. Beat until just combined — don’t overmix. - Step 5 – Combine Dry & Wet:
Gradually mix in the dry ingredients until a soft dough forms. Scrape down the sides of the bowl as needed. - Step 6 – Fold in Chocolate:
Stir in your dairy-free chocolate chips or chopped chocolate chunks. - Step 7 – Shape the Cookies:
Scoop 1½ tablespoon-sized portions of dough (use a cookie scoop if possible) and place them on the prepared baking sheets about 3–4 inches apart. - Step 8 – Bake:
Bake for 8–11 minutes, until the edges are set but the centers still look slightly soft. - Step 9 – Cool:
Let the cookies cool on the baking sheet for 5 minutes, then transfer to a wire rack to cool completely. - Enjoy your soft, chewy, buttery dairy free chocolate chip cookies!
Notes
- Measuring Flour: Always weigh your flour or use the scoop-and-level method. Too much flour = cakey cookies.
- Butter Substitute: If needed, replace the butter with solid (not melted) coconut oil.
- Chocolate Options: Try dairy-free dark chocolate, vegan white chocolate chips, or a mix for variety.
- Storage: Store in an airtight container at room temperature for 5–6 days.
- Freezing:
- Baked cookies: Freeze for up to 2 months; thaw at room temp.
- Cookie dough: Scoop into balls, freeze on a tray, then transfer to a freezer bag. Bake from frozen — add 1–2 minutes to the baking time.
- Reheating Tip: Microwave a cookie for 5–10 seconds for that “fresh-from-the-oven” gooey texture.
- Prep Time: 10 min
- Cook Time: 10 min
- Cuisine: American






Leave a Reply