There’s something wonderfully nostalgic about the first spoonful of a perfectly chilled Oreo trifle. The way each layer creates a symphony of textures—the cloud-like whipped cream, velvety chocolate pudding, and those unmistakable Oreo cookie crumbles that maintain just enough crunch to remind you they’re there. This dessert has become my secret weapon for potlucks, family gatherings, and those times when I need an impressive dessert but the oven is otherwise occupied.
I first discovered my love for Oreo trifle at my aunt’s summer barbecue years ago. As a notorious chocolate lover, I watched in awe as she assembled this striking dessert in a clear glass bowl, creating dramatic black and white layers that had everyone reaching for their phones before diving in with their spoons. When I finally tasted it, that perfect balance of creamy and crunchy, sweet and slightly bitter from the chocolate cookies—I was hooked. I’ve been perfecting my version ever since.
Why This Oreo Trifle Works Magic
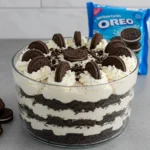
What makes this particular trifle stand out is the addition of a cream cheese layer that brings a subtle tanginess, cutting through the sweetness and adding a cheesecake-like dimension. The contrast between the dark cookie crumbles and the pristine layers of cream creates a visual impact that’s hard to beat, especially when served in a clear trifle bowl or individual glass cups for a more elegant presentation.
This dessert also hits that perfect sweet spot of impressive yet virtually foolproof. There’s no baking involved, no temperamental ingredients, and the assembly process is forgiving enough that even kitchen novices can create a showstopper. Plus, it actually improves with time in the refrigerator as the flavors meld together and the cookies soften just slightly from the surrounding creamy layers.
Gathering Your Ingredients
For the very best Oreo trifle, quality ingredients make all the difference. Here’s what you’ll need:
For the Layers:
- 20 Oreo cookies, crushed (plus extra for garnish)
- 2 cups heavy whipping cream (cold for best whipping results)
- 2 tablespoons powdered sugar
- 1 teaspoon pure vanilla extract
- 1 (3.9 oz) box instant chocolate pudding mix
- 2 cups cold milk
- 1/2 cup cream cheese, softened to room temperature
- 1/4 cup granulated sugar
- 1/2 cup crushed Oreos (for garnish)
Ingredient Insight: While you might be tempted to use pre-made whipped topping to save time, I find that freshly whipped cream creates a more luxurious texture and pure flavor. The few extra minutes of effort transform this simple dessert into something truly special. That said, if you’re truly pressed for time, whipped topping will certainly work!
Creating Your Oreo Masterpiece
The beauty of this dessert lies in its distinct layers, so taking a bit of care during assembly will reward you with a visually stunning result. Let’s break down the process:
Step 1: Prepare the Chocolate Foundation
In a medium bowl, whisk together the instant chocolate pudding mix and cold milk until completely combined. Work quickly and thoroughly to avoid any dry pockets of pudding mix. Set this aside to thicken for about 5 minutes—the pudding will be ready when it can coat the back of a spoon but still has a slightly pourable consistency.
Pro Tip: For the smoothest pudding, I like to whisk for a full minute, then let it rest for 30 seconds, and give it one final whisk. This ensures any stubborn dry bits get fully incorporated.
Step 2: Create the Perfect Whipped Cream
In a large, chilled bowl (I actually place mine in the freezer for about 10 minutes beforehand), beat the heavy whipping cream with powdered sugar and vanilla extract. Start on medium speed until soft peaks begin to form, then increase to high speed until you achieve firm peaks that hold their shape but still look glossy and smooth.
The whipped cream serves dual purposes in this recipe—half will be folded into the cream cheese for a cheesecake-like layer, and the rest will create distinct clouds of sweetness throughout the trifle.
Baker’s Secret: The temperature of your cream matters significantly. Cold cream whips faster and creates more stable peaks. I even chill my beaters alongside the bowl for the best results!
Step 3: Prepare the Creamy Cheese Layer
In a separate bowl, beat the softened cream cheese and granulated sugar until completely smooth and slightly fluffy, about 2 minutes. This step is crucial—room temperature cream cheese will incorporate much more easily than cold cream cheese, preventing any unwelcome lumps in your finished dessert.
Once your cream cheese mixture is silky smooth, gently fold in half of your prepared whipped cream. Use a rubber spatula and a light hand with a figure-eight motion to maintain as much air as possible while creating a uniform mixture.
Texture Tip: If your cream cheese isn’t completely softened, you might end up with tiny lumps in this mixture. If this happens, don’t panic! Simply beat the mixture a bit longer, and most lumps will smooth out. Any remaining small lumps will be barely noticeable in the finished trifle.
Step 4: Crush Those Cookies
For the cookie layers, you’ll want a mixture of textures—some fine crumbs and some chunkier pieces. I find that placing the Oreos in a zip-top bag and crushing them with a rolling pin gives me perfect control over the size. Leave some larger pieces for textural interest rather than pulverizing them into dust.
Cookie Wisdom: Don’t scrape out the cream filling—those white centers add sweetness and help bind the crumbs together slightly, creating a more cohesive layer in your trifle.
Step 5: Assemble With Artistic Flair
Now comes the fun part—creating those beautiful layers! In a trifle dish or individual serving cups, start with a layer of crushed Oreos at the bottom. This creates a cookie “crust” foundation reminiscent of an Oreo cheesecake.
Next, add a generous layer of the cream cheese mixture, spreading it evenly to the edges of your dish. Follow this with a layer of chocolate pudding, again taking care to create an even layer.
Add a layer of the reserved whipped cream, and then repeat the entire process: Oreos, cream cheese mixture, chocolate pudding, and whipped cream. Depending on the size of your trifle dish, you might get two or three complete sets of layers.
Visual Impact: For the most dramatic presentation, try to keep your layers relatively even and make sure they’re visible from the outside of the glass. Clean up any smudges on the inside of the glass with a paper towel before adding the next layer.
Step 6: The Crowning Glory
Finish your masterpiece with a final layer of whipped cream and a generous sprinkling of crushed Oreos on top. For an extra special touch, you might place a few whole Oreos around the edge or stand them upright in the center.
Creative Garnish Ideas:
- Chocolate curls made by running a vegetable peeler along a chocolate bar
- A light dusting of cocoa powder over the top
- Mini Oreos placed decoratively around the edge
- A drizzle of chocolate sauce in a decorative pattern
The Patience Test: Chilling Your Creation
While it might be tempting to dive in immediately, this is one dessert that rewards patience. Refrigerate your trifle for at least 1 hour, though 3-4 hours is even better. This resting time allows the flavors to meld beautifully, and the cookies soften ever so slightly while still maintaining their distinct texture.
Make-Ahead Magic: This trifle can actually be prepared up to 24 hours in advance, making it perfect for entertaining. The texture continues to improve over time, though I wouldn’t go beyond the 24-hour mark as the cookies will eventually become too soft.
Serving Your Oreo Trifle
When it’s finally time to serve your creation, use a large spoon to scoop deep through all the layers, ensuring each serving contains every element of this delicious dessert. The beauty of a trifle is in the combination of all those flavors and textures in each bite.
This dessert serves beautifully on its own, but if you’re feeling extra decadent, a small drizzle of chocolate sauce over each serving takes it to another level entirely. A cup of strong coffee or a glass of cold milk makes the perfect accompaniment to balance the sweetness.
Variations to Keep Things Interesting
While this classic Oreo trifle is perfect as is, there are countless ways to put your own spin on it:
- Mint Chocolate: Use Mint Oreos and add 1/4 teaspoon of mint extract to the whipped cream
- Coffee Infusion: Dissolve 1 tablespoon of instant espresso powder in the milk before making the pudding
- Peanut Butter Dream: Swirl 1/4 cup of melted peanut butter into the cream cheese mixture
- Berry Beautiful: Add a layer of fresh raspberries or strawberries between cream layers
- Caramel Delight: Drizzle thin layers of caramel sauce between the cookie and cream layers
The beauty of trifles is their flexibility—feel free to experiment with different flavors while maintaining the basic structure of alternating creamy and crunchy elements.
Why I Return to This Recipe Again and Again
There’s something wonderfully comforting about a dessert that’s simultaneously impressive and approachable. This Oreo trifle has been my companion through countless celebrations—from summer cookouts to holiday gatherings, birthday parties to impromptu dinner guests. Its reliability and crowd-pleasing nature make it one of those recipes I can turn to when I need something special without the stress of complicated techniques or hard-to-find ingredients.
Each time I place this stunning black-and-white creation on the table, I’m reminded of that first time I tasted it at my aunt’s barbecue—the way conversation momentarily paused as everyone admired it, followed by the chorus of appreciative murmurs with the first bite. It’s these small moments of shared delight that make cooking and baking such a joy.
I hope this Oreo trifle brings as much happiness to your table as it has to mine. Happy layering!
PrintOreo Trifle Recipe
- Total Time: 1 hour 20 minutes
- Yield: 8-10
Description
A stunning no-bake Oreo trifle with layers of chocolate pudding, cream cheese, whipped cream, and crushed cookies—perfect for gatherings.
Ingredients
20 Oreo cookies, crushed
2 cups heavy whipping cream (cold)
2 tbsp powdered sugar
1 tsp vanilla extract
1 (3.9 oz) box instant chocolate pudding mix
2 cups cold milk
1/2 cup cream cheese, softened
1/4 cup granulated sugar
1/2 cup crushed Oreos (for garnish)
Instructions
- In a medium bowl, whisk the chocolate pudding mix with cold milk until well combined. Refrigerate for about 5 minutes until thickened but still spoonable.
- In a large chilled bowl, beat the heavy whipping cream, powdered sugar, and vanilla extract until soft peaks form. Continue beating until firmer peaks develop. Set aside in the refrigerator.
- In a separate bowl, beat the softened cream cheese and granulated sugar until smooth and fluffy, about 2 minutes. Gently fold in half of the whipped cream.
- Place Oreo cookies in a ziplock bag and crush using a rolling pin. Leave the cream filling intact.
- In a trifle dish or large clear bowl, begin with a layer of crushed Oreos, then cream cheese mixture, then chocolate pudding, and a layer of whipped cream. Repeat the layers.
- Finish with a layer of whipped cream and sprinkle the remaining crushed Oreos on top. Garnish with whole Oreos if desired.
- Cover lightly and refrigerate for at least 1 hour before serving. For best results, chill for 3–4 hours.
Notes
- Make-ahead tip: Can be prepared up to 24 hours in advance; flavor improves as it chills
- Serving suggestion: Use a large spoon to scoop through all layers.
- Storage: Keep refrigerated and consume within 3 days.
- Presentation tip: Assemble in individual glasses or mason jars for elegant servings.
- Prep Time: 20 minutes
- Cook Time: 0 minutes
- Method: No-Bake
- Cuisine: American
